Minggu, 05 Desember 2010

Types of Photography

Types of Photography

Photographic work can be divided into dozens of categories, many with lots of sub-categories. The following list describes some common types of photography.
Aerial From a plane, helicopter, balloon or other airborne device.
Adventure, Action Adventure sports, daring feats, etc.
Amateur Any type of photography practiced by non-professionals.
Animal, Pet Pets and their relationships with humans. Note that the human content is often as important as the animal.
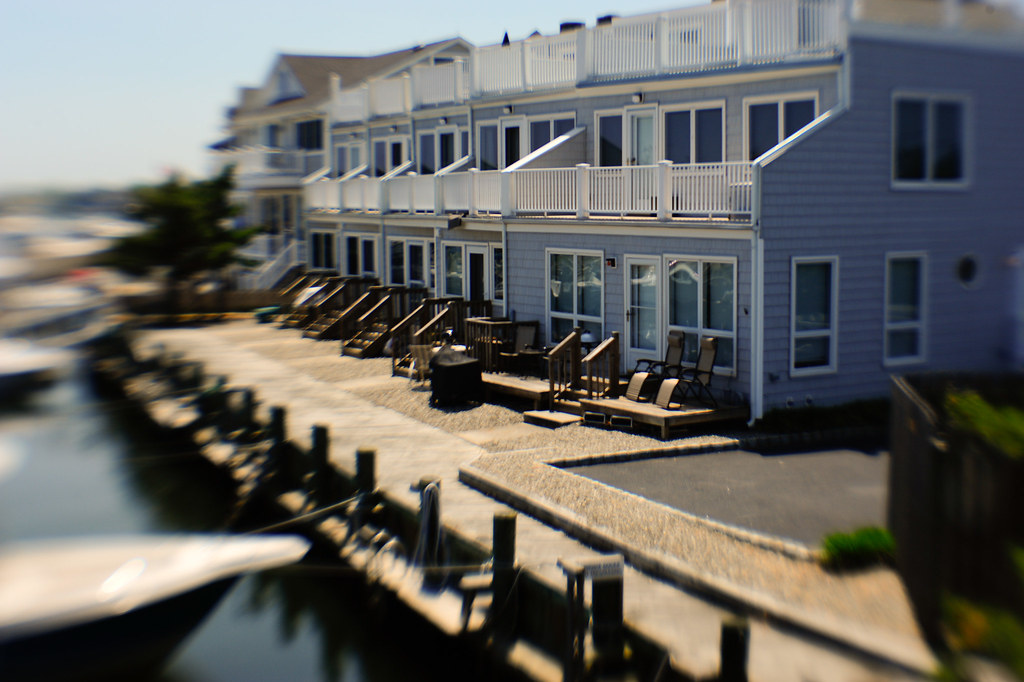
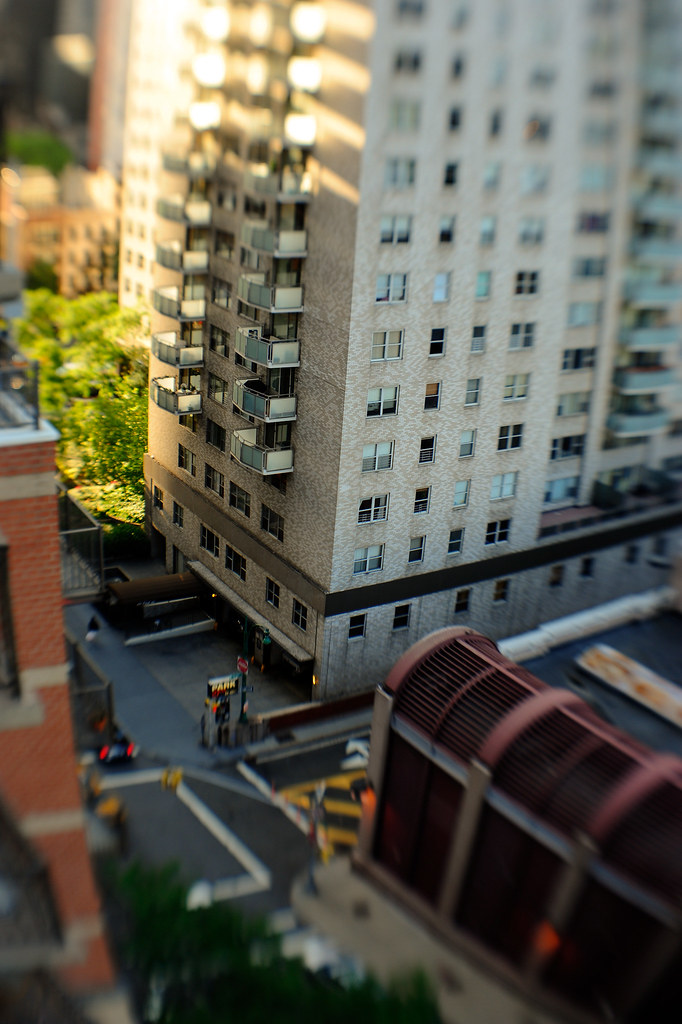
Architecture, Real Estate The art of making property appear attractive. Often involves panoramic photography.
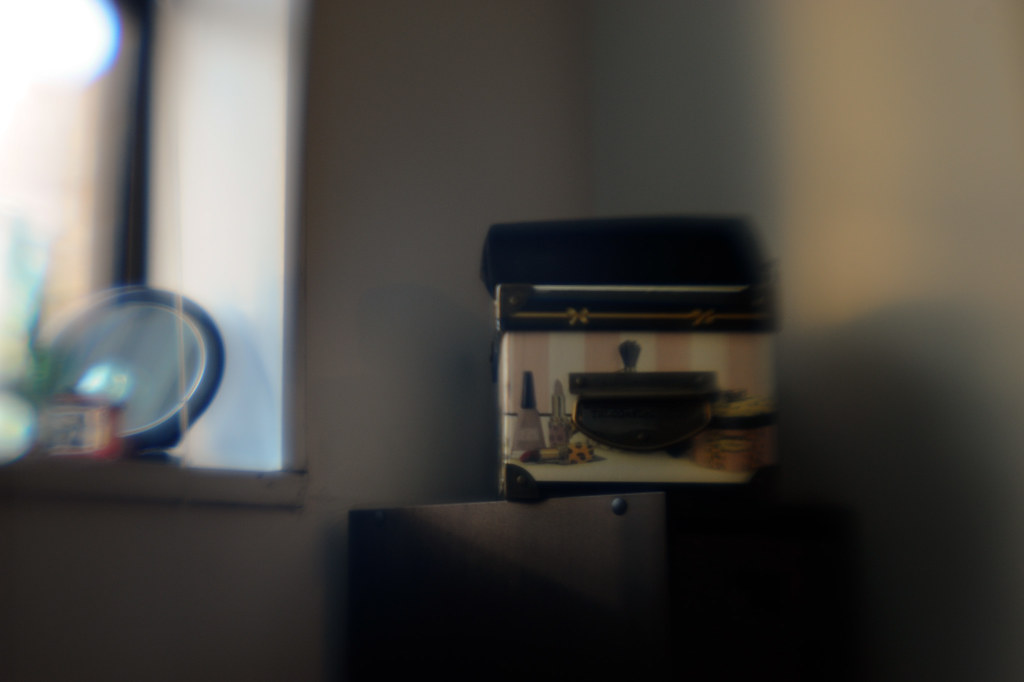
Artistic Photography in which creative composition is the goal.
Astrophotography Space photography, through a telescope.
Aura A controversial type of photography which some claim can photograph a person's aura. Often confused with Kirlian photography.
Black & White Not simply photography without colour, black and white photography explores shapes, tones and textures. Shadows and highlights become much more important.
Camera Phone "Convenience" photography using a mobile phone's built-in camera. While not the best quality, camera phones have opened a new world of spontaneous, on-the-spot photo opportunities.
Commercial Product shots, advertising, etc.
Digiscoping Photography through a telescope or binoculars.
Documentary Journalism, Events, Historical, Political, etc.
Event Concerts, parties, festivals, weddings, etc.
Forensic Police and legal photography.
Infrared Photography in which the recording medium is sensitive to infrared light rather than the normal visible light spectrum.
Large Format For use on posters, billboards, etc.
Kirlian A type of contact print photography in which an object touching a photographic plate is connected to a high voltage source, creating an aura-like image. Often confused with aura photography.
Macro The art of photographing very small and/or close-up objects.
Medical Specialized photography for clinical purposes, i.e. to help reveal and diagnose illness.
Microscopic Any technique for photographing objects too small to be visible to humans.
Modeling Photographing objects to be converted into 3D models.
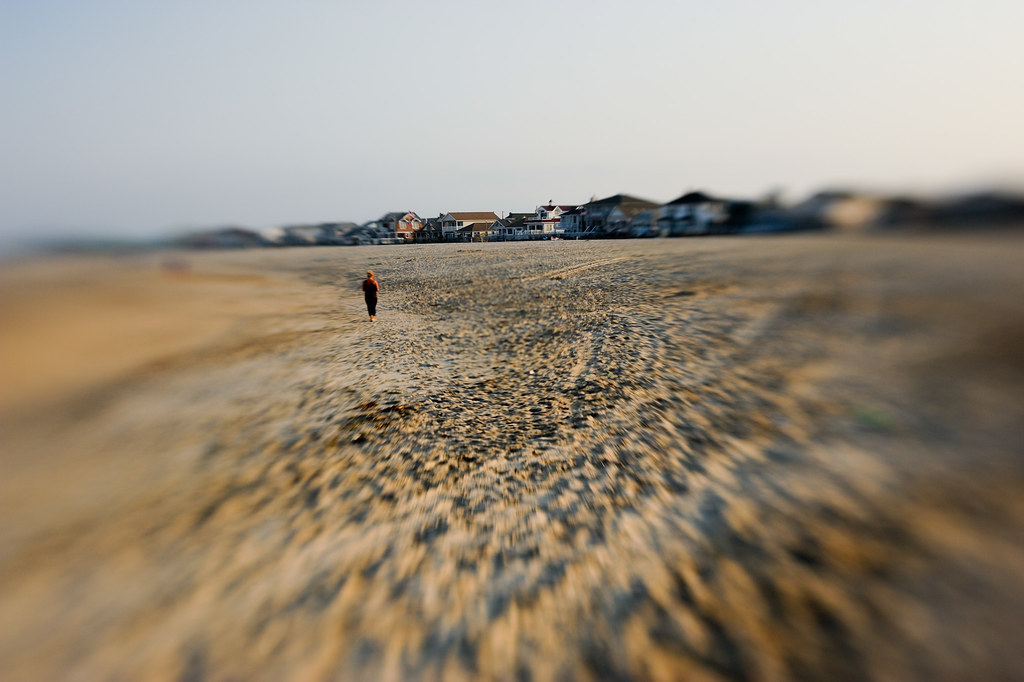
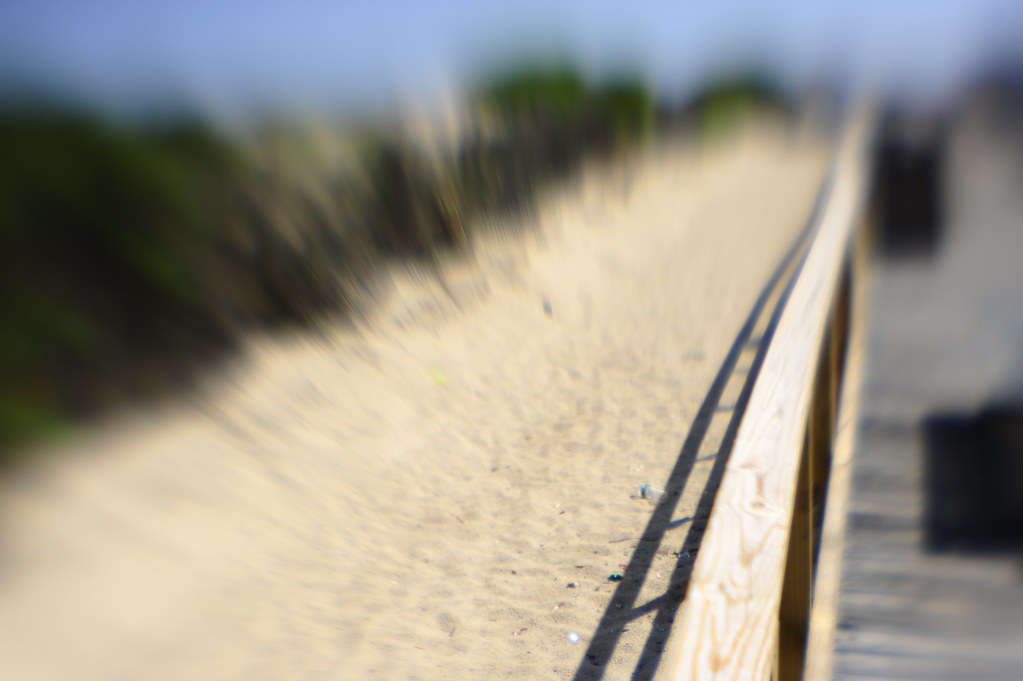
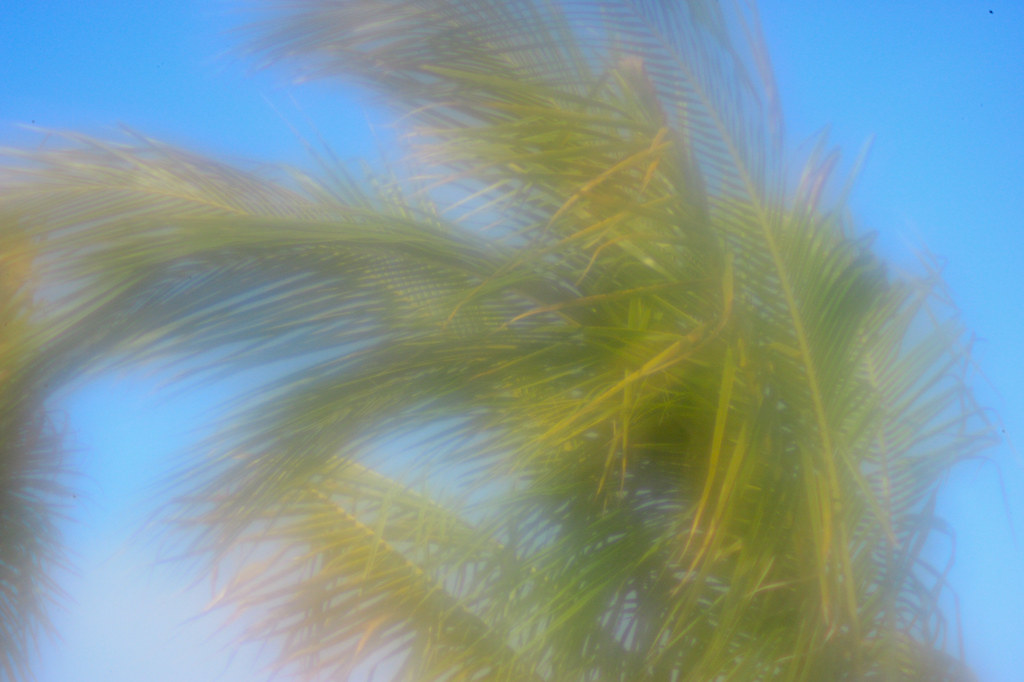
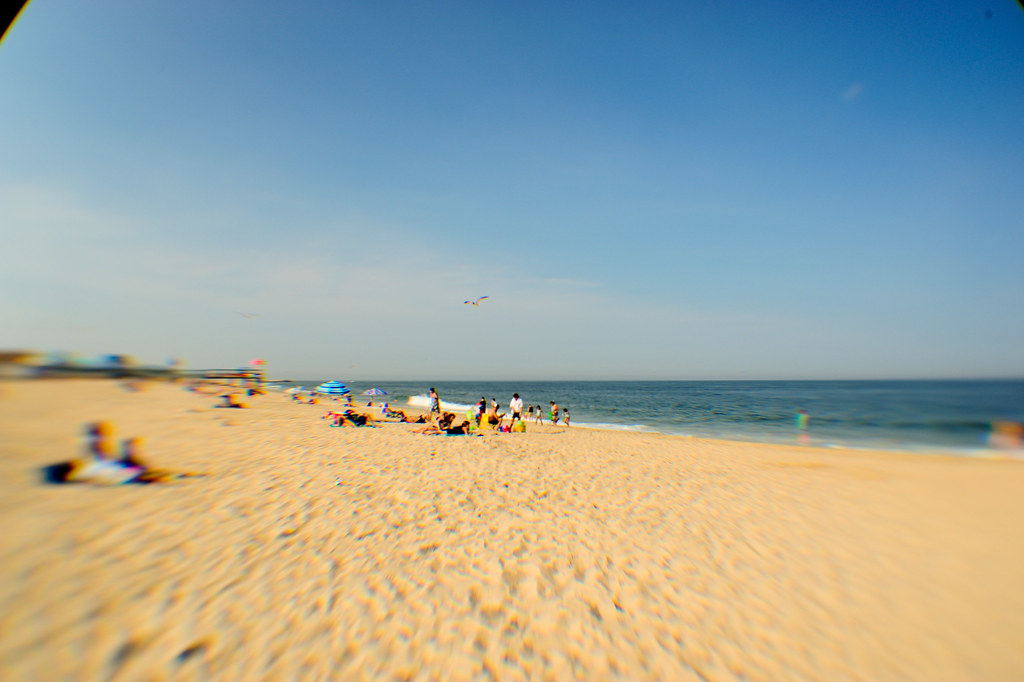
Nature Landscapes, animals, plants, sea, etc.
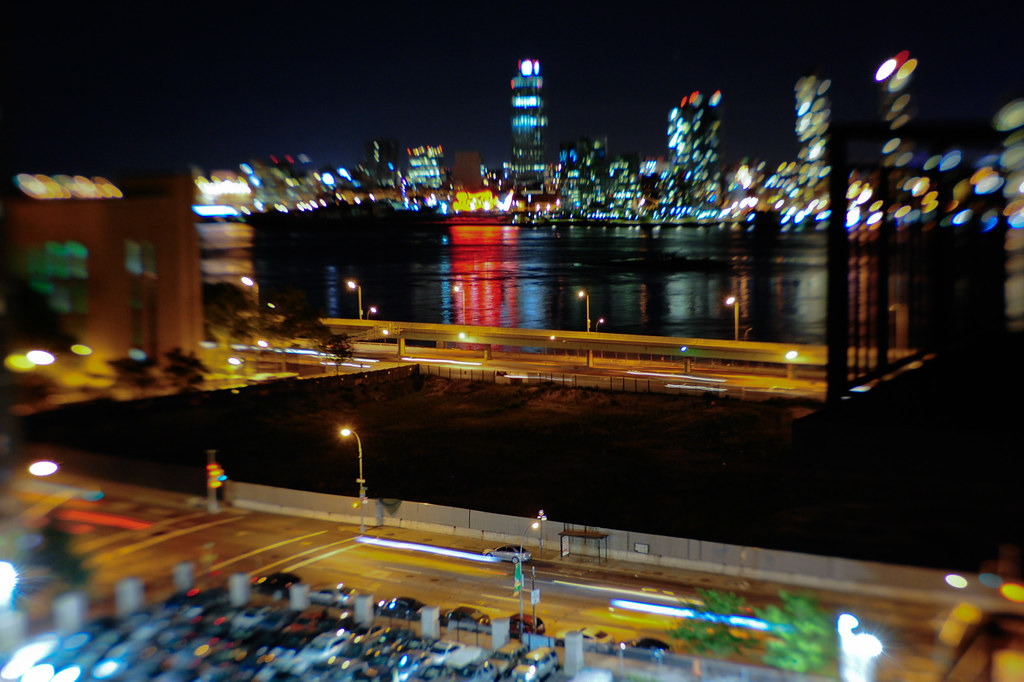
Night Any technique used to capture images at night. Often includes infrared photography.
Panoramic Views of wide areas, up to complete 360° panoramas.
Paranormal Ghosts, unexplained phenomena, etc.
People Candid, Family, Fashion, Glamour, Passports & Visas, Portrait, Pregnancy, School, Sports, Wedding


Travel Photography to showcase locations, illustrate travel literature, etc.
Ultraviolet Photography in which the recording medium is sensitive to ultraviolet light rather than the normal visible light spectrum.
Underwater Any type of photography taken under water with a water-tight camera housing.
Urban, Industrial Emphasizing urban environments.


 his is photo , picture from vista background


Pinhole Uses the most basic type of camera possible — a box with a tiny hole to let light in.
Scenic Landscape, Cityscape
Satellite Views of Earth from orbit.
Scientific Any specialized photography used for scientific endeavour, e.g. electron microscopy photographs, medical photography, astrophotography, etc.
Sports The specialized art of shooting people engaged in sports, games and adventure activities.
Stereoscopic (3-D) Involves taking two photos simultaneously to simulate 3-D vision.
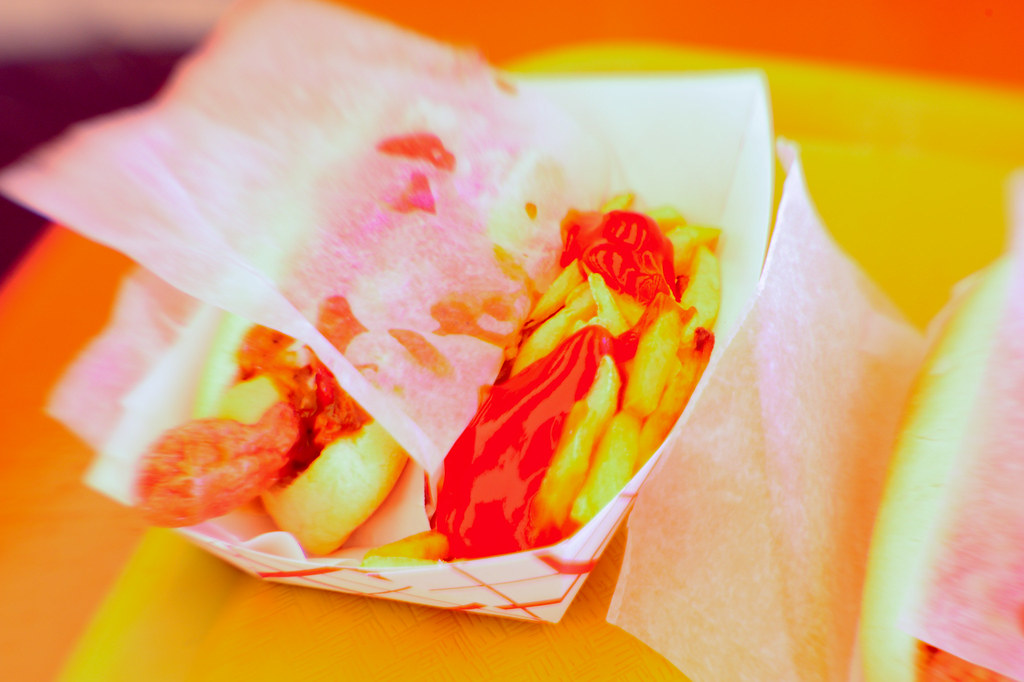
Stock Photographs taken for distribution to other people, for use in their projects. These photos tend to be quite generic, e.g. people working, landscapes, places, etc.
Time-lapse Photographs with a very long exposure, used to illustrate something happening over time. A popular example is a street at night with car lights blurred into long lines.

Senin, 29 November 2010

How to Make Good Pictures With Your Camera! By Muhammad Sohail Khan

With the advent of digital camera technology, taking pictures has been more fun than ever. We don't have to worry about paying for bad pictures at the photoshops and neither do we have to wait for long days to get our surprises(pictures) back. With digital cameras, taking pictures has become very easy and a fun thing to do. Take a shot, you like it, keep it otherwise delete it, that is as simple as it can be.
Most of us nowadays own a digital camera but we don't really know how to take good pictures. By just observing some simple rules, one can make very nice photos with a camera. With digital cameras particularly, this is very easy as one can take more than one picture and keep the best of all.
The following can summarize a good composition:
  • First is the way one should hold the camera. A camera should be help in a way the hands does not block the view in the viewfinder or the live screen.
  • Imagine your shot, have a clear picture of what you want out of your shot.
  • Try to capture as much of your main subject and try to avoid the rest as much as possible. For a portrait, this means usually to fill the person or persons in the frame completely and avoid everything else. For a nature shot, frame nicely what you want inside the picture.
  • Watch for the horizon, most pictures turn out to be out of level. Be careful with the way the camera is handled.
  • Watch out where the light source e.g. the sun, light bulb etc. is. The camera should not be facing the light source otherwise the photos will turn out dark. The camera should always be facing back to the source while the subject should be facing the light source so he/she/it is properly illuminated for a clean visible picture. In case of light source into the camera, the pictures will be dark and the subject would be not visible.
  • Watch out for the camera settings before taking a shot. In low light conditions, the shutter speed can be very slow so the camera should be held steady for quite some time.
  • Use the flash light where necessary, though it can be very tricky but try multiple shots. Do not use a flash when the subject is against a white wall or a bright background. The reflection from the white wall or the bright background can cause the shutter speed to be faster, making the the subjects appearing very dark. Try using the flash with dark or no backgrounds.
These were some very basic tips for novices and beginners. Any questions or comments, welcome:)
Muhammad Sohail Khan
Be, MScEE


this is photo , picture from vista background 

Jumat, 05 November 2010

Free Photo Highest Quality Photography

Free Photo Highest Quality Photography

Back Porch Photo of the Day: Tiger and Phil Have Swords Will Use Them The day in pictures: Wednesday Tamrac Aero Photo /Laptop Backpack (Brown and Tan) The road to steel deadline Epson Color Ink Set with Photo Black for The Stylus R Inkjet Photography community including forums reviews and Miley Cyrus: Single yes but sober? Photo Basics - inch -in- The View From Your Window Contest: Winner # Pioneer High Capacity Pocket Photo Album ( x photos )

Jobar - Deluxe Table Top Photo Studio Lamps Quality Images Tales of the Last Spike Canon PIXMA MP Wireless All-in-One Multi-Functional Inkjet Gospel greats area musicians set sights on secular sect 'America's Next Top Model' recap: Hot gondola action Canon Computer Systems B Wireless Photo All-In-One Digital Photo Finish UPCRL SnapLab DIGTL Photo Printer Image hosting free photo sharing video sharing at Photobucket Epson Color Ink Set with Photo Black for The Stylus Photo Square Perfect SP Photo Studio in a Box

Community Photo Printing Photo Album Muslin Backdrops

Pandigital x personal Photo Slide and Negative PANSCN Canon B IP PIXMA Photo Color Inkjet Printer Back to School Tenba Photo /Laptop Messenger Daypack - Black - - UPS Pilots Establish Safety and Security Task Forces Amid Recent Threats to ... The View From Your Window Contest: Winner # Photo Gallery browse our photography galleries at Photo net Photography community including forums reviews and Canon B IP PIXMA Photo Color Inkjet Printer Back to School 'America's Next Top Model' recap: Hot gondola action Pioneer Embossed Leatherette Frame Photo Album - Black Floral (Holds

Pioneer High Capacity Pocket Photo Album ( x photos ) Pandigital x personal Photo Slide and Negative PANSCN Smashbox ' Photo Finish' Targeted Pore & Line Primer oz Photo Sharing Stock Photography Photo Dropper Makes it Easy Haiti on high alert as hurricane Tomas approaches Hewlett Packard x PREM Gloss Photo ST Pioneer AE Cloth Photo Album with Frame X-Sage Green Daily links: Dancer slugged by Demi Lovato is said to be considering a lawsuit Canon B IP PIXMA Photo Color Inkjet Printer Back to School Kleer-Vu Photo / Hand CRATED Bonded Leather Collection Holds

Selasa, 02 November 2010

do more with photography today

photography today, all about background, vista, design and wedding photo,etc, this is new from article about photography

Do More with Digital Photos than just Digital Photo Printing

By Ziv Haparnas
When digital cameras were first introduced they were used mostly as digital replacement to film cameras. Users would shoot photos, print them and archive them in photo albums. As users became more sophisticated new ways to use digital photos were found. Here are a few.
The most basic thing you can do with a digital photo is print it and view it on paper or save it on a computer's hard disk and view it on the computer screen. There are however some other ways to use and enjoy digital photos - here are a few ideas:
Desktop photo wallpaper: Your computer desktop is a great place to display special photos. Setting a photo that you like as your desktop wallpaper allows you to view it every time you log on to your computer or have your application windows minimized or consume only part of the screen. You can also use software that allows you to choose a list of photos to rotate through as your desktop wallpaper: it can be done on a time basis (the photo is changed every X minutes, hours or days), or on a random basis (the photo is changed to a randomly chosen one every X minutes, hours or days).
Photos in your screen saver: When your computer is idle it can be programmed to do one of many things: turn off the monitor, go into standby mode or show a photo (either a full screen photo or a smaller photo that floats around the screen). You can program your screen saver to show a photo that you especially like or you can choose a list of photos the screen saver will rotate through (either on a time basis or on a random basis). Setting your photos as your screen saver or desktop wallpaper allows you to view and remember experiences on a continuous basis. Viewing is something that happens in the background, does not consume dedicated time.
Digital photo frames: Digital photo frames are devices that elevate photo frames up to the digital era. Traditional photo frames have a single paper print inside a frame that you hang on the wall, put on your desk or on a shelf. On the other hand digital frames embed an LCD screen that allows you to display different digital photos at different times. There are many types of digital photo frames some can receive the photos wirelessly from your computer while others has internal storage for up to a maximum number of photos. Other features include the ability to read memory cards content directly from your camera. Most digital photo frames can work in few modes: show a single photo until you manually switch to another one, roll through a list of photos or show photos randomly.
Photos in cell phones: New cell phones can do much more than voice calls. They include cameras and allow you to take photos and short video clips. They can also store photos and display them on their small LCD screens. If you have a photo that you like you can download it to your cell phone (usually using special software that is bundled with the cell phone) and set it as your cell phone wallpaper. In this way you carry the photo and its experience with you all the time and can share it with people you meet.
Photos as personal icons: Some software allow you to load any photo you like that will represent you when communicating with other users. MSN messenger is a good example - when you chat with a friend you can set a photo that your friend will see that "represents" who you are and what you feel. You can load photos that tell something about you and about what you're going through - maybe a photo from your birthday party if you had one in the last week or two - or from your last trip abroad.

Digital photos in blogs and social networks: Social networks and personal blogs are extremely popular. Almost everybody has a page on one or more such networks. You can upload photos to your personal page that represent who you are and what you are going through. It is a good idea to keep those photos fresh - if something happens to you, if you saw something interesting or if you took a photo that you would like to share with others for any reason - upload it to your page and let everybody see and enjoy it.
This list is just a short example of what can be done today with digital photos. This list is far from being inclusive and what it really intends to do is to seed your imagination so that you can come up with more out of the box ideas for using and enjoying digital photos.
Ziv Haparnas is a technology veteran and writes about practical technology and science issues. This article can be reprinted and used as long as the resource box including the backlink is included. You can find more information about photo album printing, photography in general and subjects like the jvc gr-axm17u camrea on Printrates.com
Article Source: http://EzineArticles.com/?expert=Ziv_Haparnas

Sabtu, 30 Oktober 2010

photo background

photo background is for optimizing result photo


Using Photo Editing Tools to Create a Lifelike Composition

By Todd Duan
editing post
Digital photo editing is now part and parcel of the photography industry. Thanks to advancements in editing software, a number of mundane pictures can be transformed into an eloquent collage, or even made to look like part of the same composition. To do this efficiently, however, one of the most essential tools is the lowly cut-and-paste.


The Photoshop Disasters blog stands as testimony to the fact that no photo editing gaffes are tolerated in today's world. If a cutout looks anything less than realistic, woe betide the person responsible for it! This is why intelligent masking is absolutely necessary for professionals, as the best alternative to spending hours selecting each and every fine edge individually. On complex and varied backgrounds such as trees, lattices or grass, the quality of the masking software is tried to its utmost. Being able to tweak transparency is also very useful, especially when blurry edges need to be blended into a new background.photo background is for optimizing result photo

Cutting and pasting pictures sounds quite simple - after all, that's the first thing four year olds learn to do in school! With intelligent scissors, it's about as easy on a computer as it is by hand... right? But think of a cutout featuring a woman against a multicolored background with hair flying behind her, or of a magnificent lion flaunting its mane in the African savannah. Do cutouts still seem that easy? Not so much!photo background is for optimizing result photo

Once cutouts are ready, it is time to play with them. Each individual cutout can be modified to fit the final composition you want to put them in. Image editing can broadly be grouped into color editing, retouching and shape editing. Shape editing includes effects like scaling, shearing, and twisting the perspective. Retouching is done in a wide variety of ways - blurring, penciling, sharpening... anything that is required to remove blemishes and enhance where required. Color is also a huge playground for the photo editor, as color balance can be altered, colors muted or brightened in select parts of your cutout, making it look anything from utterly realistic to billboard-worthy to downright spooky.

Digital Image Editing is used by amateurs and professionals alike, to take their images one step above the run-of-the-mill. Remove picture background, add a new one, combine multiple images, and you can have a wonderful composition on your hands!

Finally, you can place your cutouts in the final composition. Create a custom background or use an existing picture - you may want to delete the foreground figures in an existing photograph and place your own cutouts in their place, or you may take a picture yourself to use as background for your composition. Some of the changes you make to the cutouts may need tweaking or even total reworking at this stage, so be prepared to take some time at this stage of your project. In the end, the goal is to end up with a project that looks exactly like the idea in your head made real.photo background is for optimizing result photo


Article Source: http://EzineArticles.com/?expert=Todd_Duan

Kamis, 07 Oktober 2010

A Profitable Hobby - Sell Photos Online By April Sears

Photography has become a very popular hobby these days; if you want to make your hobby profitable and earn extra bucks, you can sell photos of yours online. Photography is now a revered art form and there is a large market of both buyers and sellers out there.

The conventional way of selling photographs was to set up an exhibition or a showcase at a gallery. This meant that unless you had connections or capital you would not have been able to successfully market and sell your photographs. The internet, however, has simplified the process immensely. If you want to sell photos, it is as simple as uploading some of your best stock work on to an online photo selling site and create a photo gallery of yours along with your profile. These photos are now in the online market, where buyers can browse through your work and if they buy any of your work, the website sends the money to your bank account.

Tips To Successfully Sell Your Photos

The first step you should take to sell photos online is to find a good online photo gallery. Any search engine will display many such websites, and now it is just about choosing the right one. This choice depends on you; almost all good online stock photo agencies charge an amount to set up your gallery on their website. You can compare the rates and terms and decide which one you want.

Once you sign up, these websites have their own verification process and this may take time. You may have to create your profile on the site and if you have any prior experience in photography, you can list your qualities and other specifications. The next thing is to upload the best of your stock photos. Stock photos are photos that are already on your hard drive. Pick the best among the lot, upload them and create your own gallery. Choose the ones that you think are good and are going to stand out amongst other photos.

How To Market Your Photos

The subsequent marketing of the photograph is tricky. The price has to be just right, as most of these websites have a base price, and it is best to start around that figure. These sites also have their own aids to help photographers successfully market their photos. Once your online portfolio is ready, you will have to be patient. Your first sell can take time. Nevertheless, it will happen as there are numerous buyers trawling the net. If you have talent and your pictures are good, you will find a great source of alternate income. This is also an excellent way to extend your hobby and make it a profession as it gives you a base.

You should also know that you can only sell digital photos on these websites; scanned photos are not permitted, even if they are your work. Always make sure that the quality of the pictures is good and that the photographs can be blown up. It is unadvisable to upload photographs that are from a mobile phone camera, as most of them do not give good blow up results. Internet is surely a good platform to sell photos. You need to just give it a try.

If you want to see how these online stock photo agencies function, or find out more about how to Sell photos or perhaps buy photos online visit the given link.

Minggu, 22 Agustus 2010

Tips to Become a Professional Photographer - 5 Essentials By Ryan A Bruss

Tips to Become a Professional Photographer - 5 Essentials
By Ryan A Bruss


As you think about becoming a professional photographer, it is easy to get caught up in taking photos. While this is important, it is also essential to have a checklist of what every professional needs in mind. Here are 5 essentials:

1) Portfolio - a photographer's portfolio is their most important asset. A portfolio should represent your best, your style, and what the client can expect when they hire you. Important elements of a professional quality portfolio are:

• Theme - how do your images relate to each other?
• Quality - only include images you feel showcase the best of your work.
• Style - as a set, the images you choose should show a defined photographic style.
• Perspective - show your images to as many people as possible that are professionals, and adjust based on their comments.
• Presentation - how you present your portfolio is as important as the images. If you plan to charge a lot for your services, make sure the is expressed through the way you present your images.

2) Brand - part of any business is a brand image. With photography where there are a ton of people who claim to be photographers and no real qualifications, it is important to distinguish yourself as a professional through a well designed brand. Important elements of your professional brand are:

• You - everything about you is the first thing that defines your brand, from your voice, gestures, to your clothing. Be consistent and conscientiously create a powerful statement of who you are as an artist.
• Logo - whether it is your name in a particular font or a logo you have designed, create a custom logo and stick with it.
• Color - chose a set of colors to use on all of your marketing materials that represent your brand.
• Font - chose a specific font that represents your brand.

3) Connections - your social network will have a huge influence on your success as a photographer. Always meet new people, maintain relationships, introduce people, and understand that almost all of the jobs you get will be from people you know. Important elements of your professional network are:

• Team - build up a team of people you work with and do projects together. If you are doing fashion photography this is particularly important.
• Clients - slowly build your base of clients by providing excellent service and images. Keep in contact.
• Business Associates - meet other people in related fields that have a connection to your business. These people are invaluable in introducing you to potential jobs, make sure to return the favor.
• Other Photographers - as odd as it may seem, you will often get work from other photographers. Whether they are busy and cannot take a job or it is not their specialty, other photographers are important connections.

4) Marketing Strategy - your ability to market yourself well is an essential skill for any photographer. Understand the importance both of in-person networking and online social networks. Keep these two networks connected, keep in contact, and always be producing professional images to promote your business.

• Homepage - having a homepage is essential to getting the word out about your business. Make sure it is professionally designed and connected to all of your social networks such as Facebook, Twitter, and Youtube.
• Business Card - essential whenever you meet a new person.
• Social Media - great for getting the word out. Remember to tag people in photos, use a watermark, and quickly respond to comments.

5) Business Plan - succeed where other photographers have failed by understanding photography is a personal business. Do research on business practices and sales and apply them.

• Sales - study how to sell yourself and your services. Sales is an art and when used consciously will exponentially increase your conversion rate.
• Contracts - have all the contract you need ready. Whether this is a model release, intellectual property agreement, or a contract for a specific job, contracts are essential for a professional.
• Costs - keep track of all your costs and factor them in when deciding on your guarantee. Remember although digital cameras are free to use, they become outdated very quickly.
• Guarantee - charge what the market dictates. Deciding on your guarantee is difficult, do your research, ask other photographers, and put yourself in a good negotiating position by not relying on any one job.

http://ryanbruss.com

Ryan Bruss is fashion and commercial photographer who provides information about how to use social media to boost a career as a professional photographer. Check out his portfolio and other informative materials at his homepage, Facebook, Twitter, and Youtube account.

Article Source: http://EzineArticles.com/?expert=Ryan_A_Bruss

Ramadan 2010 By Mansoor Lakhani

Digital Photography is as one of the easiest and rewarding hobbies. To get the best out of your photographs there are certain elements you need to consider, in order to fully enjoy the hobby of capturing wonderful pictures.

1. Consider what you enjoy. Find your special topic so that you can fully understand your chosen subject. It is important to have good knowledge of the subjects you want to photograph.

2. Invest in a digital camera that will meet all your needs, consider what you will be using the camera for and what you will be using the photos to create.

For example if you are going to use it for print graphics you may need a hi quality camera, or if you are going to use it for web photography you may only need a cheap low end camera.

3. Get to know your digital camera by practicing taking photos in your home or in your backyard. Study the subject and consider how it will best represent in your image, look at photographing the image from a different angle, photograph it from the top, take your camera to the same level as your subject. Sometimes you may even create great shots on unexpected and unplanned moments.

4. Considered use a tripod. You can produce great images when you have a steady camera and set it up for the best angles. Pay particular attention to the size, shape and position of the subject

5. When shooting in door or a studio you need to be aware of the lighting, spend some time and consider how you could best create artificial lighting to support the brightness and color of the photograph. Sometimes the camera flash is insufficient in supplying the needed light to create a clear image.

These are only some guides for you to enjoy digital photography as a hobby.

Many believe that beginners taking photography as a hobby can end up professional photographers.

Learn Digital Photography Now - Is an excellent guide to Digital Photography and finding which camera suits your needs. For more information visit: http://sites.google.com/site/learndigitalphotographyclub

Selasa, 13 Juli 2010

Canon Rebel T2i Vs Canon EOS 50D - Which DSLR to Buy By Wayne Rasku

Canon Rebel T2i Vs Canon EOS 50D - Which DSLR to Buy
By Wayne Rasku


Have you been trying to decide about a digital SLR for personal use? It can get confusing, right?

What about the difference between Canon's newest rave, the Rebel T2i vs EOS 50D?

Let's start with price, just because that is a good starting place.

Apples to apples - body only (no lens included), you can get the Canon Rebel T2i ($875) for about $125 less than a Canon EOS 50D ($999). Actually, since the introduction of the Canon EOS 7D, the price of the 50D has come down significantly, but stay tuned for the "rest of the story."

Even though the Canon Rebel T2i is touted as an "entry level" digital SLR, the features rival and even surpass the 50D in a couple of areas. It is kind of difficult to think of the T2i as a camera just for beginners in the SLR photography market. There are many advanced photogs who are getting one for a backup to their higher end model.

The main advantages of the Canon Rebel T2i vs EOS 50D:

Video - this feature is totally lacking on the 50D. And the T2i has improved dramatically over it's older sibling (T1i). The video is pretty darn good, although it is not quite as good as a dedicated video camera. But it truly is an advantage to have both still and video in the same camera.
Resolution - The Canon Rebel T2i is a full 3-megapixels more than the EOS 50D. The image quality is improving as well, compared to older Rebel models.
Exposure Compensation - The Canon Rebel T2i sports a +/-5.0 full stops while the EOS 50D can only range +/-2.0 stops.
Zone Metering - The Canon 50D has 35 point evaluative metering which is not bad, but the T2i has a new 63 point evaluative system.
Now, as a new photographer, you may not get too excited about things like exposure compensation and zone metering. Perhaps you don't even know what they are, which is the exact point of the comment above that the Canon Rebel T2i should not be considered a camera just for beginners. With this camera, Canon has "raised the bar" for entry level digital SLRs.


Let's take a quick look at the advantages of the EOS 50D vs the Canon Rebel T2i:

Build quality - It has the "feel" of a more professional camera.
AF system - Faster, more accurate auto focus, with a microfocus adjustment.
Quick Control Dial - This dial on the rear of the camera allows users to get quickly to most camera controls.
Continuous Shooting - Much faster burst rate at 6.3 frames per second vs. 3.7.
Shutter speed - 1/8000th of a second is twice as fast vs. 1/4000th.
Bottom Line - The playing field is getting smaller. When buying a digital SLR camera, you really need to examine the features to evaluate them against your needs. Many photographers are finding that even the entry level products are fully capable of giving them a quality image similar to the higher end, far more expensive, cameras.
The Canon Rebel T2i is a remarkable digital SLR which can compete with the big boys in a few very significant areas. It is well worth considering getting a T2i rather than an EOS 50D. In fact, it is almost a given that the engineers at Canon are hard at work coming up with an EOS 60D to make camera buying even more interesting.

More about the Canon EOS 50D at http://digital-photographic-resources.com/cameras/mid-dslr.html.

Article Source: http://EzineArticles.com

Photography Managed the Change From Film to Digital - New Ways to Work By Lars Nyqvist Lundin

Photography Managed the Change From Film to Digital - New Ways to Work
By Lars Nyqvist Lundin

The dark period is over. It's over with hazardous chemicals in the bathroom, with negatives and slides.

From the day we open our eyes, thousands of images flows through our system every day and creates our consciousness. The computers, which are screens, has long been regarded and treated as typewriters. Internet as an image communicator is only in its infancy.

Today's information society has exploded in the pictures. The digital image, which reached the professionals and individuals in the mid-90s, changed everything. Delivery times shortened, costs reduced and the environment, said goodbye to all hazardous liquids. New camera brands emerged and old ones where buried. Nobody uses Minox or Rollei Flex today. It is Casio, Samsung and Sony. Mobile phones have raised new milestone in ease of use of photography.

The 135-mm film had the media industry in a stronghold. The structure of silver grains yielded superior color reproduction and sharpness. Color film was late, and had for years been used by private individuals. The expensive cost of printing color images are rarely justified in the newspaper. Completely inconceivable today!

When news of the digital camera came as an apparent heir, it was met by a very critical eye. Some photographers would never take in this creation. The first camera was a disaster for image quality. Battery power was beneath contempt. There was also a much faster process and news photographers could deliver very close to deadline.

The quality of daily newspaper was having constant problems with color alignment and black level adjustment, while the digital still image quality quickly accepted. Today, the quality surpassed reality and have old negatives look like sandpaper. Nostalgic still think silver grain is the basis of all images.

The future belongs to multiple-camera that takes still images, video and record audio. Check out some pictures here: http://www.larsnyqvistlundin.com
For your first guidance go here: http://www.larsnyqvistlundin.com Contact me on:larsnlundin@gmail.com Make it your mission! I am an entrepreneur internet marketer giving tips in financial literacy leadership and how to get residual income. investing in your future

Article Source: http://EzineArticles.com/?

Cheap Wedding Photographers Are a Great Way to Slice the Wedding Budget By Chris Hartpence

Even cheap wedding photographers know that they need to be careful how they photograph the bride and groom. Every woman wants to look attractive at all times but no more so than on her wedding day. She will expect an expert to be able to take flattering shots at all times. She will not want to look fat or frumpy in her wedding photos and if she does the person she will blame will be the photographer.

As any photographer knows it is always best to meet with the couple prior to the big day to decide on the types of shots to be taken, how many and who will be in them. This is a perfect time for the couple to ask questions but it is also a good time for the photographer to help them get the best results too. Nothing ruins a photograph quicker than bad clothes so discussing what they both will be wearing is a good thing to do. Obviously the bride to be may not want her future husband to see her dress but she can always show it to the photographer. Thankfully wedding dresses are normally not bright and garish so that will help with the ultimate result. But it also helps if the person taking the shots is prepared with additional lens and filtration systems if necessary!

This is also a good time to teach the couple how to pose for the camera. Very few people look good on film when the camera is pointed straight at them. A couple will look more romantic in a shot when their heads are slightly tilted towards each other rather than away from one another. Certain poses will show the woman's figure in a more flattering light so now is a good time to practice these as well. Anything to achieve a better result on the day to give the couple the memories they want and the photographer repeat business as a result of their glowing testimonials.ezinearticle.com

Selasa, 29 Juni 2010

The ZV420MW8 Buying Guide By Calvin Colding

It can be hard to purchase a dual or combo device in local appliance stores, especially if you're looking for the VCR feature. There are many trusted brands in the market like Samsung, Insignia, and Toshiba but why don't you check out the Magnavox ZV420MW8?
The product is quite known in the market, especially among people who still love using the VHS or VCR feature. If you shop online, you can find new ZV420MW8, although in some stores you can also find used or refurbished ones. The used devices are cheaper but since the combo unit costs less than $120, it's a better deal to purchase the new one, and you can be assured that it is free from defects.
Read a product review or two before making the purchase to be sure that people are satisfied with the device. Most online store post reviews on the product but be sure to read the unbiased ones. This is the best way to make an informed purchase. Once you've found a store that offers special perks or discounts, grab the opportunity and buy one.
You can enjoy viewing your old VHS or VCR recordings from home. When the device is delivered to you, take it out of the box together with the other accessories and read the manual before attaching the converter, the video or audio cables (to the TV), and other important settings. In no time at all, you can have the device up and running. Hurry and buy the ZV420MW8 while it is still on stock!
Calvin Colding reviews many things about ZV420MW8 Combo Device. Please visit his VCR Player Only site for latest information.
Article Source: http://EzineArticles.com/?expert=Calvin_Colding

Learn How To Capture Stunning Pictures With These Basic Digital Photography Techniques And Tips

Use these digital photography techniques and tips to get the most from your digital camera.

Do you want to be able to learn digital photography techniques and take great photos in any situation?

I'll give you digital photography lessons and practical advice on getting the best results, whatever the subject: - Portraits, Wedding tips, Close-up or Macro, Landscape, Night, Sports, Infrared – you name it!

Remember: Be INSPIRED and GET CREATIVE.

The first area we need to cover is your digital camera. Your camera is a tool! You need to know how your camera works – its functions and capabilities.

Familiarise yourself with your digital camera by trying out each of the features and read the manual as you go.

Don’t be afraid to take lots of pictures – this will help you understand the camera more.

In order to make best use of these digital photography techniques, you need to be able to have manual control over your camera's functions – this gives you a lot more creative control over the resulting image.

The types of digital photography techniques you can apply will be different depending on the type of camera you have – smaller point-and-shoot cameras typically will have fewer options - or limit you to common presets.

More advanced digital SLR's will give you greater flexibility over how the picture is taken. These ‘Prosumer’ and ‘DSLR’ models also have interchangeable lenses that allow for further creative photo options.

Before we look at some of the more advanced digital photography techniques, I want to quickly recap on some of the basic skills that will make a huge difference to your amateur photographs in minutes.

Frame Your Shot. A frame focuses attention inside the picture. Your photos can include their own frame to add drama and draw attention to the subject. Try taking a picture through an archway, through a window or even out of a cave.

Get Closer. One of the most important rules of photography is to get closer to your subject. By getting closer to the subject, there is less chance of the surroundings distracting the viewer's eye when displaying your photograph.

To acquire a good camera technique and gain an excellent digital photography education, you should sign up for an online photography class at one of the many online schools.

You can find out more information by searching for the institute of photography in Google.

While online photo courses are useful, they can be quite expensive. You can learn about digital photography techniques quite quickly in your spare time just by reading this website or buying Amy's Digital Photography Success ebook.

My last tip before you start is...fix one thing in your mind...move around. The best photographers know that a particular point-of-view makes or breaks a photograph.

You need to be creative with your shots and always look for – the different angle - the other direction. Practise these digital photography techniques and be different for more impact and fun!

Digital Macro Photography
Close-up as it is more commonly known is useful if your favourite subjects are small.

If you are photographing flowers, insects or jewellery, you’ll need to get close to fill the frame.

Macro means taking pictures of subjects nearer your camera than it will normally focus.

Typically that means between a few centimetres and a metre away.

Digital Portrait Photography
Taking Portrait photographs is an art with few masters. A digital photography technique that you might assume is easy, because all you are doing is capturing a person’s likeness.

There are many elements that go into making a great portrait – make-up, lighting, the equipment, camera and subject.

The main question I ask myself when taking a portrait shot is ‘Why am I taking the portrait?’ Is it formal, casual, comical, etc…

Digital Infrared Photography
You can take photos without visible light with most cameras. This is known as Digital Infrared Photography

Instead of registering visible light – that is green, red and blue – the camera records images made by invisible light, which is beyond red. Without sounding too ‘techy’, light that has longer wavelengths than ordinary red light.

Going infrared requires screwing a filter onto your lens. Blues turn almost black and green becomes a ghostly white.

Black And White Digital Photography
Almost all digital cameras have a series of black and white or monochrome modes within their menus that allow you an easy way to get extra creativity from your shots, when you need it.

A black and white image is a record of the brightness of your subject. That is how black and white photography works. It excels in capturing shapes, patterns, lights and moods.

Digital Landscape Photography
A well composed landscape shot should have a beginning, a middle and end, just like a good story.

The quality of light can have a profound effect on the appeal of a landscape photograph, so make it your priority.

Generally the best time to shoot a landscape photo is in the early morning or late afternoon. The sun is lower in the sky and the light has beautiful warmth to it.

Digital Wedding Photography
Digital Photography Techniques - Digital Wedding Photography - Picture by Allen Venables of www.allenvenables.com    The key to successful wedding photography is preparation and planning. You’ll need to visit the venues, before-hand and also talk to the bride and groom about what shots you’ll need to keep everyone happy.

An essential piece of kit for the wedding is a flash. There will be a lot of indoor photos and a tripod would also be useful.

Digital Sports Photography
Sports photography involves capturing the action of a fast-moving subject or event. At fast-paced sport's events, this can be a real challenge.

This is one of the trickier digital photography techniques.

Timing is everything with action photography – often you only have a split second to take a picture.

Digital Night Photography
Digital night photography can produce some stunning shots full of illumination.

This type of photography requires long exposures to get enough light onto the sensor, so a tripod is a must. You can be really creative with night shots and some of my favourites include fireworks and cityscapes.

I hope you have found these digital photography techniques and tips to be useful and interesting. If you want to keep up-to-date with this website as it grows, then why not subscribe to my Digital Photography Blog or sign up for my newsletter.

By the way, my friend and business partner, Amy Renfrey, has a great and easy to follow ebook called Digital Photography Success. If your photos are less than satisfying, then let Amy show you the digital photography techniques required to make your pictures superb and outstanding with sharp clarity and perfect definition.

Amy is offering a special deal on her photography courses at this moment in time so make sure get yours before it’s too late.
More Digital Photography Techniques

http://www.digital-photography-tricks.com/

Canon Powershot S200 Battery Charger - 3 Types Reviewed By Victor Parker

Canon is among the top rated brands of digital cameras around the world. This is due to its high quality images and solid construction. Canon offers a wide range of digital cameras, from ELPH series to the popular SLR.

Due to a constant shift in world technology, handling audio and visual information has been completely redefined. This is eminent with the Canon Powershot s200. But with this quality, it needs power.

This is where a Canon powershot s200 battery charger comes in, you can choose among these three:

1. Re-chargeable Li-ion Battery; it has a high capacity of 3.7V or 850mAh, and is 100% compatible with the digital photo cameras original chargers; it has a one year warranty and fits models like:

-    IXUS 200a            - IXUS 500

-    IXUS 300            - IXUS V

-    IXUS 300a            - IXUS V2   

-    IXUS 320            - IXUS V3

-    IXUS 330            - IXY Digital

-    IXUS 400            - IXY 200   

-    IXUS 430            - Powershot S330, S100, S110, S200, S230

2. DCA-1L Batteries is designed specially to exceed or meet OEM specifications, and it is compatible with the digital cameras original charger 100%.

3. Canon NB-1L Battery is designed by Amstron for Canon models Powershot S100, powershot S110, powershot S230, powershot S300, and powershot S400 Elph digital cameras.

These batteries are widely available in the market. However, if you are quite unsure if you are getting the right battery for your digital camera, you can always ask for help from the experts. Don't change batteries without having proper knowledge about it, otherwise your prized digital photo camera will get damaged or go to waste.

Victor Parker enjoys writing about other subjects such as quick Halloween costumes and easy Halloween costumes.

permission to publish by keeping links active

Article Source: http://EzineArticles.com/?expert=Victor_Parker

Sabtu, 26 Juni 2010

Digital Photography Training and Assistance For Amateurs By Michael J. Price

One must have sufficient knowledge or have undergone digital photography training before even jumping into holding a camera and take pictures.
If it is your first time to use the camera, consider entering the date and time. The date and time will help you systematize, establish, and recognize your images later on.
Check camera settings From time to time. You can find them on the control panel and in the viewfinder. Become aware of the number of pictures you can take at the present settings and the condition of the battery charge. Also, find out what the icons stand for. You may want to change the settings in the future and you would not like to forget what you have done.
Take note that images taken will be stored completely before the camera shuts off.
Pay attention to the shutter buttons. Most of them have two stages. When you press halfway down, the camera is set in focus and exposure. When you press it all the way down, you take a picture. To be able to capture moving shots, you need to hold the push button halfway down while focused on the view. When you then press the button the rest of the way, the camera shoots right away for the reason that the focus and exposure are already calculated. On some cameras, you can also press the shutter button all the way down in a single action, however, there will be a hindrance before taking a photo and it may be out of focus.
If you think that the viewfinder is blurry, be sure to check if the camera has a diopter modification button or setting that makes it sharper.
Digital photography training teaches you how to take pictures appropriately. Grip the camera with your right hand and allow your left to support the camera or lens. Never block the flash, auto focus port, or lens.
Images are initially stored in the camera's internal memory called a "buffer". In the event that the buffer is full, wait until other images are finished transferring into the memory card of your camera before you take additional pictures.
One digital photography training knowledge that you must never forget is not open the battery or memory card access covers while an image is being saved. This cannot just damage the image it self-but can also break your memory card.
You can typically correct and change the color and brightness of the camera's monitor. The trick is to make it brighter in bright light and dimmer in dim light.
Taking many shots is also a perfect idea. You can explore and take shots on a different position, distance, angles on a given subject or scene. You can also try changing the camera modes and try taking pictures in black, white, in sepia, or other hues and you might be amazed and surprised of its outcome.
For a much more in depth and thorough discussion, seek for assistance of a professional on digital photography training.
Taking Photos Is Easy, But Producing Prints On The Quality Of A Professional Photographer Is Difficult! Go Grab Yourself The Guide On Digital Photography Training And Digital Photography Lessons.
Article Source: http://EzineArticles.com

Why Choose Digital Photo Printing? By John Basilone

Digital photography allows the avid photographer to escalate his hobby or interest to much higher levels. Not only can you develop a trigger finger from snapping endlessly at every movable or stationery object, you can basically record every single event of interest to its minute level. From the first twitch of your newborn baby to a shot-by-shot movement of your favorite sports star, all this is made possible. The only deterrence is probably the space on your flash card, to which you have the option to invest in external storage of gargantuan magnitude.
Seeing all these photos in digital format is well and good. However you realize a subtle nagging at the back of your mind to perhaps develop some into printed copies. Nothing beats seeing printed versions of family photos adorning a side table or the mantle piece, else arranged carefully in conventional photo albums for posterity sake and passed around during family celebrations.
Digital photo printing is therefore the balm to your headache. There are aplenty offering standard and customized services to cater to your printing needs. Within the scope of standard services, you upload your digital photos to their site, specify quantity and size of prints, and make payment. Depending on their turnaround time, they'll send the prints to you without much of a hassle.
Some digital photo printing sites allow you to share your uploaded photos for others to view and print at their own accord, access and permission to be managed by yourself. As such, these function quite similarly to social networking sites which allow resources, photos in this case, to be shared.
In addition to simple prints onto photographic paper, digital photo printing also covers the ability to produce customized photos books or albums. You select a scheme of your choice for the end product to commemorate weddings, family holidays, corporate functions or whatever event of relevance. Alternatively, these photos can be printed onto mugs, posters, cards, stationery, T-shirts, etc. All these make excellent gifts or souvenirs of that special occasion.
Technology has allowed digital photography to excel in great leaps and bounds, thus easing the process of sharing joy and memories.
Author enjoys writing and sharing articles on topics such as photo printing and 11x14 prints. Visit for more information.
Article Source: http://EzineArticles.com

Senin, 21 Juni 2010

Underwater Digital Camera Accessories You Should Have By Kalyan Kumar

Life under the sea is something that attracts many people particularly snorkeling and diving enthusiasts. As much as there are beautiful landscapes and animals to be marveled at on land, there are also colorful creatures and unique plants underneath the sea. In short, they're also picture perfect.
Divers and snorkeling lovers should, therefore, take time to capture the wonderful marine life. Taking photos of aquatic creatures and plants are great investments and proof you can share with your children and grandchildren as well as your friends.
The most important thing to bring along when you are up to the challenge to take pictures below the sea is a digital camera - whether point or shoot or the DSLR model - or even one that uses film. But not just any standard camera because you need to have one that is waterproof or one that is really meant for underwater use.
Otherwise, you will have to buy an extra digital camera accessory. This is the so-called camera housing that you can buy from any camera store whether online or offline. Most brands have this but keep in mind to get one that fits your particular digital camera model. This accessory covers the entire unit and made from durable waterproof material making it fit for use underwater. It also has a flash diffuser that may be built in and is used in front of the internal flash to soften the light.
If your camera is the waterproof type, it should have a seal with a rubbery O-ring. This ring should be lubricated using silicon grease. You can apply this by rubbing the grease on the O-ring using your fingertips.
The lens is another accessory you should take into consideration. This will allow you to get closer to your subjects while still being able to attain clear focus and image. For underwater use, experts recommend using wide-angle lens or macro lens. The advantage of the macro lens is that it has the ability to take images of marine life in a very close range. This is the lens used when you see photos of aquatic plants and creatures that show even their tiny and colorful details.
Lighting accessories are vital as well. This is needed to ensure that the images you capture will appear clear and well lit without shadows and dark areas. For this purpose, you can use an external flash or strobe. You can also add a diffuser to spread out the light.
After using your digital camera under the sea, make sure to clean it well. First, remove the battery before rinsing it with warm water. Then, let it dry completely. Let the back of the camera face downwards to ensure it dries thoroughly. Just remember to avoid leaving your unit under the full heat of the sun.
Another important thing to keep in mind is to check that the waterproof connections of the camera are still well sealed. Finally, have your unit checked regularly by a professional just to be sure that it is still in good condition.
For information about camera accessories, visit 42photo.com, New York's legendary camera store in business for over 40 years.
Article Source: http://EzineArticles.com/?expert=Kalyan_Kumar

How to Take Better Digital Photos of Pets By Patrick Laundy

For taking top-class snapshots of your pet, you don't have to be a professional photographer. Just by keeping a few essential things in mind, you can easily capture outstanding shots. Let's learn how to take better digital photographs of pets.
• Try to capture your pet's unique personality
Each pet has a unique personality. Some are lazy, quiet and docile, while others are hyperactive, energetic and inquisitive. Try to take shots when your pet is sleeping, eating, playing or just jumping around. Every activity that your pet indulges in showcases their personality and you should surely capture such unforgettable moments.
• Pay attention to location and background
Always choose the location carefully. Your pet should be comfortable at that place, and it should also evoke emotions, not only in your pet, but also in you. The next important thing that you should take into account is the background. With respect to pet photography, the best location is one that is plain and simple like a patch of green grass or a well-lit room with white walls and red carpet.
• Get down to their level and shoot them closely
Avoid taking snapshots while standing up and looking down at the pet. Instead, get down to his level and look into his eyes. Also try to shoot him as closely as possible. If your pet is active and likes to move around, then it will be exceedingly difficult to get close to him. In such a case, you should buy a camera that is equipped with a zoom lens.
• Lighting is important
Lighting is an important factor with regards to pet photography. The usage of flash will either distract the animal or scare him away. In some instances, it also creates the problem of red eye. Thus, natural and artificial light sources are better options. Use flash only if your pet has dark colour fur, it will help to highlight even the smallest details.
• Use sports mode for active pets
If you are not very comfortable using full manual mode, then sports mode is just for you. In this mode, you can easily capture excellent snapshots of your overtly active pet. Alternately, you can also use shutter priority mode, where you have to set the shutter speed, and the camera will do the rest of the things automatically.
• Catch them unaware
If you wish to take natural photographs, then make an effort to catch your pet unaware. It is unusually difficult to persuade the animal to pose properly. Hence, paparazzi style photos are the best bet.
• Let them play around
Let your pet play around with toys, and capture their playfulness. The photo shoot should be enjoyable for both you and your pet.
• Include owner and others
If you want your digital photographs to look real, then don't forget to include yourself and other family members. When the animal interacts with his owner, genuine emotions are evoked, which are worth capturing.
• Checkout different perspectives
Try out different angles and different perspectives. Apart from full body shots, you can capture three-quarters of the body or focus on single features like eyes, nose, ears, and so forth.
• Don't hesitate to experiment
Remember, expertise only comes from experimentation. For this reason, don't hesitate to experiment. You will only end up with a few bad shots, and nothing else is going to happen. On the contrary, continued experimentation will make you a perfect professional pet photographer, in a short span of time.
In addition to writing tips and tricks to help people take better photos I also manage a free online photo album called OurPhotos. It allows you to create photo albums and easily upload and share you photos with others.
Article Source: http://EzineArticles.com/?expert=Patrick_Laundy

Photography For the Homebound By Paul A Todd

Although travel is possibly the greatest inspiration for photography, it is not always possible to get away. You may be on a tight schedule with work, bound by social commitments, or simply on a tight budget. Yet you have the bug! You want to take and make more photographs - so what, then?
Much as I would like to be off taking photos of exotic locales it is generally not possible. And taking photos locally all the time can get pretty boring, but there are things that you can do.
1. Weather: Take advantage of changes of weather. I always hear people complain about rain but I rarely do - it is a photographer's best friend. Rain brings out colours that are otherwise hidden. Overcast skies create an even light so everything is exposed equally. It looks great in black and white, too, and reflections off wet roads, buildings, cars, anything, have a particular sheen. If the sun comes out then it is great for high-key photos. Do not be afraid to shoot into the sun and get a bright overexposed shot because they can look highly dramatic.
2. Choose a different time: just that. Take photos at a different time of day and get a different kind of light. The sun has just set and now you're doing night photography. Take advantage of the different conditions. Use the artificial lights to gain exposure, get in amongst the light and use the contrast between the dark of the night and the brightness of car headlights, shopfronts, etc.
3. Abstracts: We see our world every day and often do not notice all that much after the 100th time. But there are details that we can find that can make great photos in their own right - a rusty gate, peeling paint, a worn wooden fence or lichen growing on rocks. Some up-close abstracts can look like landscapes in their own right as we scale down our vision. There are whole worlds in the miniature.
4. Portraits: I have long been a bit funny about taking portraits and I should get over it. It's the personal nature of them that can be a little unnerving for me, yet they are a great opportunity for photography.
5. Home studio: 'I live in a small place and have no room for a studio', I hear you cry. (I've got excellent hearing.) But a little improvisation with a large sheet of paper can provide you with a mini-studio and any interesting artefacts will do - experimentation is the key. In this age of digital photography, there is no worry about running out of film. I take many shots that don't work out, but then one or two do very nicely and it is worth the small effort that it took to get them.
6. The ordinary: Not every shot has to be a blockbuster. Some of my favourite shots are also very ordinary and it is their ordinariness that makes them interesting to me. We live in the ordinary world and so why should that not be celebrated?
7. Post processing: Go through your old shots and using whatever software you have, bought or free, play around with them. Be aware that special effects can be gaudy and unattractive, and the simplest effects (unless you are a photoshop wiz) are usually the most effective. An ordinary shot can gain a special ambience simply by making it black and white, adjusting the white balance or adding a little soft focus. The image can be altered and recombined in layers with itself to create an enhanced image, as with the Orton Effect.
There is never any really good excuse aside from sickness for(ezinearticle.com)

Take Better Pictures By Carol Culver De Leo

3 Tips on How To Take Good Pictures
Whether you use your phone camera or a high quality digital camera, here are a few tips to help you take better digital pictures.
Sometimes a scene comes too quick and you just have to act fast to try and catch the shot.
If you have the time though, think about how you want to frame your shot. What is it about the view that you want to capture and share with others?
How To Take Good Pictures
Take an objective view of how the image appears on your screen. Are there any telephone poles sticking out ruining the shot? Can you move the camera over slightly to get an unwanted object out of the frame? Does Uncle Bob look like he has flowers sprouting out of his head because of the background behind him?
After taking the shot, review it. Does it reflect what you are trying to share with your photo? Sometimes it is a good idea to take several shots. When you get back home and upload your images you can choose the best one and delete the others.
Try Different Angles
When taking digital shots of people, pay attention to the angle of your camera. Avoid shots looking up at people, hold you camera at an angle that is even with or slightly above your subject.
When I take photos of people, I always try to get the most flattering shot. We all want to look our best when a picture is taken of us. If a shot I have taken turns out poorly, I will toss it out rather than offend anyone....
I was once humiliated on Facebook. Someone posted a photo that was a really embarrassing image of me. I was standing next to a baby elephant feeding it, and my dress was billowed out and I looked twice as big as the elephant. Needless to say, I threw that dress away.
Pay Attention To The Horizon
Besides wanting to get a nice straight horizon line on your shot, you can play around with where you want your horizon line. Do you want it in the middle of the shot, showing an equal part of sky and land? Move your camera around and check out the different effects.
When I first started taking photos with my digital camera I would sometimes forget to check the horizon line in my image frame. I would get home after a day of shooting and discover my beautiful ocean sunset was crooked. / Well, not that crooked, but enough to ruin the photo for me.
I don't know how many images I threw away because they were crooked, until I learned that you can straighten any digital photo with good editing tools.
But it is still important to focus on the horizon, even though it can be fixed. Good photography starts with good images. A digital image can always be edited to improve it, but the less editing the better.
Take the time to frame your shot, check your angle, and watch your horizon, and you will see an improvement in your digital photos.
As hard as we try to take a great photo, sometimes an image just needs a little tweaking to make it perfect. There are wonderful tools for editing your images. You will find a list of free tools and more tips on taking better digital photos at WallpaperWave.com You can also share your work with the world by adding your favorite image to the desktop background collection gallery!  (ezinearticle.com)

The Journey to a Wedding by a Wedding Photographer By Michael Valeriani

The journey to a wedding can be a real nightmare, because a wedding photographer simply cannot be late. If you plan everything carefully, you'll have nothing to worry about; the important thing is planning well ahead. On the few occasions when the photographer is late, the whole wedding comes to a standstill: nobody wants to start the ceremony without the photographer, otherwise all of the long term memories will be compromised. Imagine this: tens of people are sitting in the church just waiting for you to arrive. What are you going to tell when you arrive there an hour late? How are you going to deal with such an embarrassing situation?
Being always late is a real disability. I know of people that are unable to keep a job, because of their time keeping skills. I myself do not keep assistants that are late. A wedding is a very important thing and being late once is enough for me not to hire an assistant again. What I tell them is this: make sure you arrive on time; if you have time keeping problems, then arrive three hours early. There are no excuses for a wedding photographer to be late. Not to talk about the financial losses you could incur into: you can be sure that you will be charged for some extras the bride and groom will incurred into because of you. The journey to a wedding doesn't have to be this stressful, actually it can be quite peaceful and pleasant. Planning early and well, will almost guarantee that you will be there on time.
Your Vehicle:
Whatever vehicle you use (car, van, motorcycle, bicycle), make sure it's well looked after. If you have a vehicle that is more than five years old, I would advise you have it checked out at least a couple of weeks before the event. This is because if there are repairs to be made, you want to be sure you'll get it back before the wedding.
If your car is not reliable, rent one. Nowadays hiring a car can be very cheap and this can easily be included in the expenses bill. Also the vehicle you arrive with tells a lot about the way you work. Much more than you would think.
Imagine: you call a plumber from the yellow pages and he arrives at your home with an old noisy bitten up pickup truck with a dirty camper shell and you can tell he lives in it. Then your neighbor's plumber arrives in the latest van, quietly, a professional advert on the side, wearing a nice work uniform. I bet you would wish you had called the other guy. You will automatically assume your plumber will not do the job properly, or at least not as well as the other guy. First impressions really count a lot.
It's the same with wedding photographers: how you travel tells how you will work. Arrive in style and the bride and groom will already trust you more, even without having touched one of your cameras. They are paying you top dollars and they want to see their money well spent and of course they want to show their family and friends that they have selected a real pro.
Want to know what I do? Just in case that something goes wrong with my car and the journey, I always keep a folding bicycle in the trunk. When such an important thing like a wedding is at stake, you have to think about the unthinkable. What if you get into an accident and your car can no longer be moved? You are still required to attend the event. Remember that accidents do happen and they are not necessarily your fault, but you will be expected to have allowed enough time for them.
This is not a normal 9 to 6 job; you are the person in charge of the only memories the couple will have of their wedding day and it is your duty and main priority do anything in your power to attend AND to be on time (which means early).
Get a membership with the local automobile club, so that you will be prepared for any mishaps and you'll have less worries as there would be someone to help you. Even if you only got a flat tire, could you change it on your own while wearing a nice suit and a white shirt? How clean (or dirty) will you arrive at the ceremony?
Always respect speed limits. Other than dramatically reducing the chances of having an accident, you'll also reduce the chances of being pulled over by the police. Even if you get a straightforward fine, you will waste precious time and you will be upset for most of the day. You are going to create art on commission and your mind needs to be clear, relaxed and happy.
The Journey:
Going to a wedding is not like going to work at rush hour on weekdays, where everything is more or less predictable. Weddings usually happen on the weekend, where sometimes (always if you live in London) unusual road works take place, trains are limited and diversions are in place.
Since it is a weekend and most people do not work, the authorities don't usually give much weight to congestion, which becomes extremely unpredictable and very heavy at times.
If you can, avoid travelling on the day of the wedding. Even if the event takes place at only 50 miles from your home, travel there the day before and stay at a cheap hotel. You will wake up nice and fresh, with plenty of time for everything... maybe even to have a nice walk in the morning before the wedding.
Make sure you know what is going on around you. A good way to do this is to watch the evening news the day before the wedding and to check for the local news website as soon as you get up in the morning. Go to any extent to make the journey go as smoothly as possible.
The Routes:
Always plan at least three routes. The first should be the quickest, the send should be the shortest and the third an emergency alternative. If your route includes a highway, plan an alternative route using local roads. Always think of the unthinkable.
Nowadays we use navigators, which are a fantastic aid in these sort of situations, but do not rely 100% on them. Always carry a city mad and a larger area map. The day before plan your route on a real map and match that with the navigator.
Keep in mind that on the weekend some roads might be closed and diversions might be in place. The journey can be severely altered and delayed, especially on a Saturday morning.
Michael Valeriani
www.find-a-wedding-photographer.com
Independent free advice to find a wedding
photographer in the UK, USA, Canada AND
plenty of advice on countless wedding issues.

Sabtu, 19 Juni 2010

Lensbaby: Bend it baby!

READ TO BOTTOM TO LEARN HOW YOU CAN WIN A LENS BABY FROM UNIQUE PHOTO

Photographers. We are the most critical and observant people on the planet. We demand the highest quality results from our equipment and rightfully so, we are passionate about our work. When a photograph doesn’t come out how we envisioned it, it is like a fisherman who has lost a big catch. He will catch other fish, but the trophy winner has escaped. Photographers are testing the limits of their equipment. At times it seems daunting with so many opinions, charts, and articles out there. Fishing is a little different, but I’m sure there are similar debates about which are the best rods, tackle, and bait.

However even a top of the line fishing rod won’t do you any good if you are trying to catch fish at the town pool. The same goes for photography, an expensive camera and lens mean nothing if you don’t use them in an intelligent way.

Like many others, I was always skeptical of the Lensbaby. It seemed like a nice toy, but a serious photographer like myself didn’t need it. As a view camera user, I understood the principle behind the Lensbaby, but to me it was just a piece of plastic with bellows that you couldn’t lock into place. Well I learned a valuable lesson after spending a couple weeks with a Lensbaby Composer and the full set of optics/accessories. To summarize, the Lensbaby has grown up! 


THE LENSBABY FAMILY

 THE MUSE

I was oblivious, but Lensbaby makes three different style lenses that come in a variety of lens mounts. The Lensbaby I referred to before is now called the “Muse”. It is the least expensive of the Lensbaby line-up, and still lacks the ability to lock focus or adjustment. Yet for some people this is perfect. It’s affordable and fast, you can shoot on the go with ease. In retrospect I wish I had used a Muse for some of my shots as resetting the Composer to zero position (no bend) took some getting used to.


 THE CONTROL FREAK

The “Control Freak” is like a Muse with a serious body kit on it. You can adjust focus and bend the lens and then lock it with the click of a button. Fine focus adjustments can then be made using the barrel on the lens. Tilt/bend can be tweaked with three equally spaced posts on the lens. If I used a tripod all of the time and/or did a lot of critical Macro work I would have used the Control Freak in a heartbeat.


THE COMPOSER
 
The “Composer” was the most appealing to me because it seemed like a happy medium between the Muse and Control Freak. It allows you to focus the lens with a big rubber focus ring and a ball-head allows adjustment of tilt/bend. A ring that sits right in front of where the lens mounts to the camera controls friction of the ball-head. Most of the time I tightened the friction so that I was still able to move the lens, but it would stay put when I took my hand off of it.


 OPTIC SWAP SYSTEM
There are varying options of Lensbabies for different kinds of photographers, but all three lenses are compatible with what is called the “Optic Swap System” Lensbaby has expanded it’s line to include the following: Double Glass Optic, Single Glass Optic, Plastic Optic, Pinhole/Zone Plate, Soft Focus Optic, and Fisheye Optic. The original Lensbaby is most similar to the Plastic Optic.


Each Optic is compatible with magnetic aperture rings that swap out with the use of an included Optic Swap tool that also acts as a storage area for the rings so you don’t lose them!

http://uniquephoto.blogspot.com


ACCESSORIES


Lensbaby makes accessories for the lenses, which allow for even more creativity. There are two (4x and 10x) close-up/macro filters, a wide (.6x) & super-wide (.42x) angle attachments, and a telephoto (1.6x) attachment that screw on to the threads of all Lensbaby Optics (besides the Fisheye Optic). The thread size is 37mm so any other 37mm filters you have will also be compatible with the Lensbaby system!


The last accessory is the Creative Aperture Kit that allows you to punch out shapes in a blank magnetic aperture ring. The kit also comes with two pre-made shapes, a heart & a star.  This effects how out of focus areas are rendered and can be quite fun.  Here is an example from Lensbaby's own Kirsten Hunter!


PHOTO BY KIRSTEN HUNTER


MY SAMPLES

I had a lot of fun using the Lensbaby Composer and all of the different Optics and Accessories. It was liberating to be roaming around the beach and various buildings with my camera, not worrying about silly things like which autofocus point/mode to use or comaplining to myself in my head how heavy my Nikon 24-70 f/2.8G is. (Because I didn't have it with me!) Here are my samples and impressions from each. (click to enlarge!)


DOUBLE GLASS OPTIC
The Double Glass Optic is the sharpest in the Lensbaby Optic Swap System. I’m not going to be replacing my 50mm f/1.4 with this lens, but it allowed me to be creative with depth of field while still keeping the focused part of my image sharp.  The Double Glass Optic comes standard with all three Lensbaby lenses.  Overall I found this to be my favorite optic.  Shot without a magnetic aperture ring, it is equivalent to about f/2.  Aperture rings range from f/2.8 to f/22.


SINGLE GLASS OPTIC
Similar to the original Lensbaby of years past. It still has a place in the lineup. This Optic is softer than the Double Glass, but still maintains a level of sharpness on the focused area, especially when using a smaller aperture like f/5.6 or more. The areas beyond the point of focus become soft and dreamy.  I would only purchase this optic as part of the Optic kit that includes the plastic and soft-focus optic as well.  Some people may enjoy the look, but I found it to be only slightly different than the Double Glass Optic, but not enough to justify buying it instead of trying out the Fisheye or Plastic Optic.


PLASTIC OPTIC

 It is softer than the Single Glass Optic, but again, using smaller apertures renders focused areas to be relatively sharp, but with softer edges and higher levels of chromatic abberation. For those familiar, think Holga.  Out of all of the Lensbaby lenses, I wish I had used this one a little bit more frequently.  I think it has a lot of potential.  Just like the Double/Single Glass Optics,  it has a standard 50mm focal length.


PINHOLE/ZONEPLATE

Mimics the traditional look of a pinhole camera. It has two different sized openings, which can be changed by pushing a switch inside of the optic. The larger “Zone Plate” opening is equal to f/19. Remember there is no glass in this optic, so even at “f/19” everything will have a blurred/ethereal effect. The smaller “Pinhole” setting weighs in at f/177 so bring your tripod! Even in bright sunlight, using the viewfinder is difficult on either setting because of the limited amount of light coming through the lens.  The focal length of this Optic is 55mm which is slightly longer than the others.


SOFT-FOCUS OPTIC
 

The Soft-Focus Optic comes with it’s own set of magnetic aperture rings that allow you to adjust the amount of softness. Nothing will be “sharp” but just like any of these Optics, it’s a look that works with certain subjects such as portraits.  I could see film makers really enjoying this optic. 


FISHEYE OPTIC

*A special adapter is required to use the Fisheye Optic with the Control Freak or Muse.*

I shot with a FX Nikon D700 so I was able to create fully circular images. On a crop sensor body, you will be able to get the quirky fisheye effect, but not fully circular images. The Fisheye Optic was a lot sharper than I expected. This is a great option for people wanting to experiment with a fisheye lens, but who don’t want to experiment with their bank account for a true Canon or Nikon fisheye.  The focal length is 12mm and without an aperture disk, it is measured to be f/4.  The special (included) FE aperture disks range from 5.6-22.  I was amazed by minimum focusing distance of 1/2 of an inch!


MACRO FILTERS
 Great little accessory here for you Macro-holics out there. I have never been much of a Macro shooter, but I was surprised just how sharp the results were. The two (+4 and +10) filters can be stacked so you can get insanely close to subjects. Again this is a great alternative to a dedicated macro lens, which like fisheyes, tend to be pricey.


WIDE, SUPERWIDE, and TELEPHOTO

The 1.6x telephoto was my favorite accessory here. It makes for a nice portrait setup and gave me sharp images when used with the Double Glass Optic. The Wide (.6x) and Superwide (.42x) just didn’t cut it on my D700. For crop sensor cameras these accessories allow for a wider angle, but the limited circle of coverage on a FX sensor discouraged me because I couldn’t bend the lens at all without severe vignetting. It certainly works, but what’s the point of a Lensbaby if you can’t bend it like Beckham?


VIDEO

I am not a cinematographer by any stretch of the imagination, but it was brought to my attention by a co-worker that Lensbaby offers huge potential for those who work with video on the DSLR cameras.  Filmmakers looking to create a special dreamy effect or strange perspective are in for a pleasant surprise.  Here is a short clip shot by Unique Photo's Edward Whittington that demonstrates DSLR video with a Lensbaby.


CONCLUSION

I am not suggesting throwing away your Canon Tilt-Shift or Nikon Perspective-Control lenses. If you have those lenses, you are a professional and you know why you need them. The Lensbaby system doesn’t replace any lens you own, even the standard kit lens that comes with a entry-level DSLR. Rather Lensbaby offers a gateway into various types of photography without committing to a professional specialty lens.

TO THE CRITICS

To me photography has always been and always will be about having fun. If you want to shoot outside of the box a little bit, buy a Lensbaby and use it. You will be surprised what you come up with. Don’t listen to the jaded critics who say “Oh it’s such a tacky/overdone look” You should only be concerned with what makes you excited about photography. Those critics are the ones mashing their keyboards about nonsense on photography forums. They aren’t making time to just go out and shoot for fun. (Isn’t that the reason all of us got into photography?) Whatever you decide to use, have fun with it and push it to its limits.

“There are no rules for good photographs, there are only good photographs.”
-Ansel Adams


 Photo by Craig Strong


If you like what you've seen so far in this review and want to win your own Lensbaby Composer, check out our Lensbaby contest on FlickrThe contest is free to enter!

All you need is a Flickr account and some good old fashioned creativity. We want to see your best photos from this summer! If you don't have a Flickr account, it's free to sign up and a great place to upload your photos and meet other photographers.  
http://uniquephoto.blogspot.com

THEME: SUMMER FUN
Show us your best image that exemplifies the essence of  "Summer Fun" taken with a Lensbaby or other perspective control optic.

Summer is a special time for everyone.  School is out for the kids and everyone wants to be outside!   It can be the calming sound of the ocean, a big wad of cotton candy, a ferris wheel at a county fair, a barbecue in the park, or the lights of the boardwalk blending into the lingering deep blue sky that appears in the summer right after the sun sets.  Anything that screams SUMMER! We want to see it!